IoT SSH Remote Access over Starlink, 3G, 4G LTE, or 5G cellular network
IoT or Raspberry Pi remote SSH access is key to monitoring, controlling and debugging industrial machineries, automobile fleet, environmental IoT sensors and smart city IoT devices from far away remote locations when human access to such devices is not immediately possible.
Environment researchers and scientists use Raspberry Pi based IoT devices to collect and stream environmental data (as MQTT data stream) to a server(MQTT Broker) in their research institution's network.
IoT or Raspberry Pi devices when placed in open fields or remote rural locations where internet access via WiFi is not readily available, Starlink, 3G or 4G LTE dongle or 4G/5G modems or cellular routers could be used to get internet access to the Raspberry Pi in the field.
SocketXP IoT Platform provides remote connectivity solution to IoT or Raspberry Pi devices in the field using secure tunnels without having to setup port-forwarding or hack the configuration in your cellular modem or dongle.
In the following section, we'll discuss how to setup Raspberry Pi or IoT device for remote SSH access over a Starlink, 3G or 4G LTE or 5G cellular network using SocketXP.
How SocketXP IoT Remote SSH solution works
Install a simple, secure and lightweight SocketXP IoT agent on your IoT device or Rasperry Pi. The SocketXP agent will securely connect (using a SSL/TLS tunnel) to the SocketXP IoT Cloud Gateway using an authentication token. You can access your IoT device or Raspberry Pi from the SocketXP Cloud Gateway Portal.
SocketXP is a highly scalable solution. It can connect more than 10K RPi or IoT devices for a single user account.
Follow the below instructions to remote SSH into your IoT or Raspberry Pi device.
Step 1: Download and Install
Download and install the SocketXP IoT agent on your IoT or Raspberry Pi device.
Step 2: Get your Authentication Token
Sign up at SocketXP Web Portal and get your authentication token.
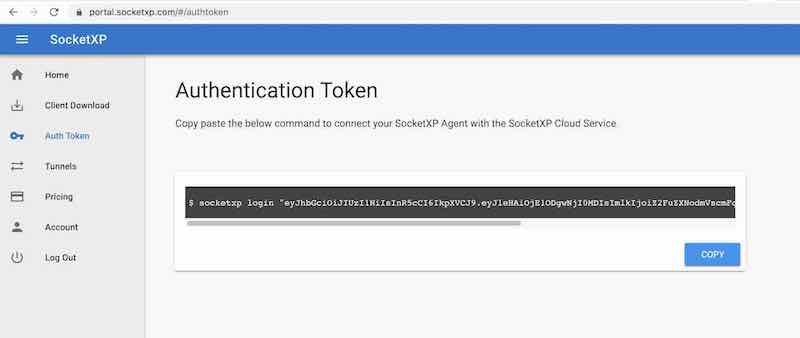
Use the following command to login to the SocketXP IoT Cloud Gateway using the auth token.
$ socketxp login <your-auth-token-goes-here> --iot-device-name "sensor12345" --iot-device-group "temp-sensor"
Step 3: Create SocketXP SSL Tunnel Endpoint for Remote SSH
Use the following command to create a secure and private SSL tunnel endpoint at the SocketXP IoT Cloud Gateway.
$ socketxp connect tcp://localhost:22

Connected to SocketXP Cloud Gateway.
Access the TCP service securely using the SocketXP agent in IoT Slave Mode.
Security Info
SocketXP does not create any public TCP tunnel endpoints that can be connected and accessed by anyone in the internet using an SSH client. SocketXP TCP tunnel endpoints are not exposed to the internet and can be accessed only using the SocketXP agent (using the auth token of the user) or through the XTERM terminal in the SocketXP Portal page.
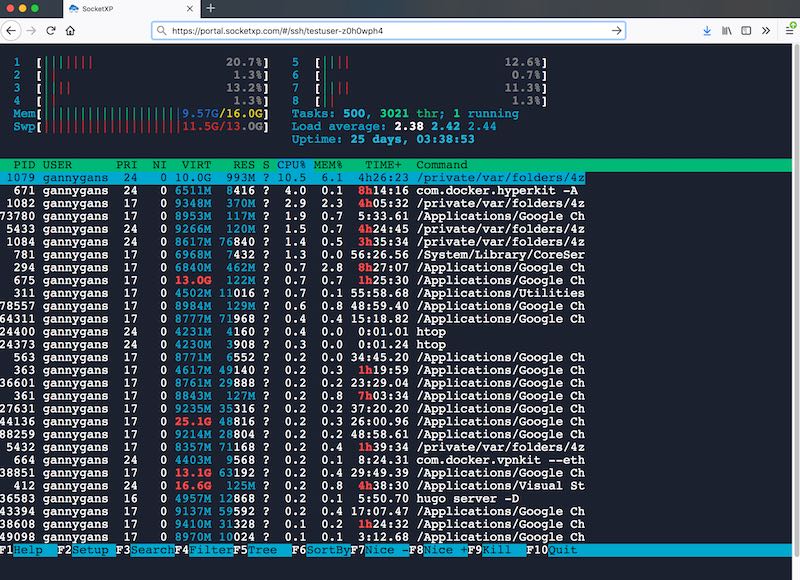
You could now remote SSH into your IoT device or Raspberry Pi by clicking the terminal icon as shown in the screenshot below.

Next, you'll will be prompted to provide your SSH login and password.
Once your credentials are authenticated with your SSH server you'll be logged into your device's shell prompt.
The screen capture below shows the "htop" shell command output from an SSH session created using the XTERM window in the SocketXP Portal page.
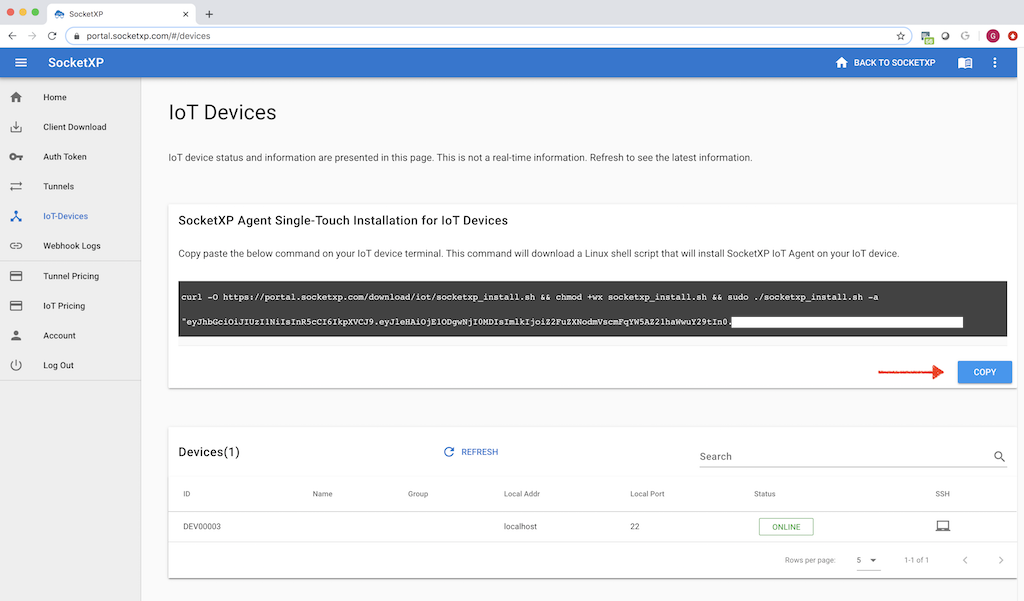
Single-Touch Installation
The 3 step instruction explained above to setup SocketXP on your IoT device is a tedious process, if you have thousands of RPi to install, configure and manage.
With this mind, SocketXP IoT Solution also provides a single-touch installation for installing and configuring SocketXP IoT Agent on large number IoT or RPi devices.
Copy paste the below single-touch installation command from the SocketXP portal page into the terminal of your IoT devices and it will install/configure/setup and bring up the devices online in our SocketXP portal.
Platform Architecture Type
The above single-touch installation command automatically reads your CPU platform arch and OS type information from the uname -m command output.
If your device is Arduino, MiniPC, NVIDIA Jetson, UDOO, Asus Tinker Board, Banana Pi, Orange Pi, Nano Pi or other Pi variations, feel free to edit the socketxp_install.sh script to meet your device or platform archtecture requirements.
In addition to installing and configuring SocketXP IoT Agent on your Raspberry Pi device, the single touch installation command would also make the SocketXP IoT Agent to run as a Linux Systemd deamon in the background. So that whenever your device gets rebooted, SocketXP IoT Agent will be automatically kickstarted on boot up.
Sample Configurations for various usecases:
The socketxp_install.sh installation script takes the following arguments:
$./socketxp_install.sh
Usage:
./socketxp_install.sh -a <auth-token> [ -p <platform> ] [ -l <local-destination> ] [ -s <subdomain-prefix> ]

Note:
Command argument auth-token is mandatory.  All other arguments are optional.
Acceptable platform values: [ amd64, arm, arm64 ]
IoT Remote SSH Configuration
An example use of the script for remote SSH configuration would like this:
$./socketxp_install.sh -a "eyJhbGciOiJIUzI1NiIsInR5cCI6IkpXVCJ9..." -p "arm" -l "tcp://127.0.0.1:22"
IoT Remote Web Service Access Configuration
For example, to set up remote access for the web service running inside your IoT device, use the below sample command:
$./socketxp_install.sh -a "eyJhbGciOiJIUzI1NiIsInR5cCI6IkpXVCJ9..." -p "arm" -l "http://localhost:80" -s "techron-ABC123456789"
-s <subdomain prefix> argument in the above command, which is a mandatory argument for web service usecase. The IoT Device ID is used as the subdomain prefix to easily map the device to the SocketXP Public URL used to access the device.
In this case, the public URL generated by SocketXP IoT Cloud Gateway would look like this:
How to setup both SSH and webservice HTTP remote access:
The single-touch installation script creates a config file at: /etc/socketxp/config.json
It would look something like this:
tunnels section in the above config file to include the HTTP webservice as well. The config.json file would look like this:
$ cat /etc/socketxp/config.json

{
"tunnels" : [
  {
      "destination": "tcp://127.0.0.1:22"
  },
  {
      "destination": "http://127.0.0.1:8080",
      "subdomain": "techron-abc123456789",
      "custom_domain": ""
  }
]
}
destination URL, destination HTTP port and the subdomain name in the above config.json file to the one that suits for your webservice.
If you have few more HTTP services running in your device, and you would like to generate public web URL for each of those services too, then repeat the same steps explained above. Add a new service configuration in the tunnels section in the config.json file. And finally don't forget to restart the socketxp systemd service for the new configuration to take effect.
Configuring SocketXP agent to run in slave mode
This is an alternate method for connecting to your RPi from a remote location using the SocketXP IoT solution.
If you don't want to access your IoT device or RPi from the browser(SocketXP Portal) and you want to access it using an SSH client on your laptop or desktop, follow the instructions below.
Note
IoT Slave Mode feature is available only in the premium paid plans.
First download and install the regular SocketXP agent software on your accessing device (such as a laptop running Windows or Mac OS). Next, configure the agent to run in slave mode using the command option "--iot-slave" as shown in the example below. Also, specify the device ID of the IoT device you want to connect to, using the --peer-device-id option.
$ socketxp connect tcp://localhost:3000 --iot-slave --peer-device-id "abc123456789" --peer-device-port 22 --authtoken <auth token>

Listening for TCP connections at:
Local URL -> tcp://localhost:3000
Accessing the IoT device from your laptop
$ socketxp connect tcp://localhost:3000 --iot-slave --peer-device-name "sensor12345" --peer-device-port 22 --authtoken <auth token>

Listening for TCP connections at:
Local URL -> tcp://localhost:3000
Accessing the IoT device from your laptop
Note
SocketXP automatically assigns a unique ID for your device.
Why this is important?
SocketXP IoT Agent when run in IoT Slave Mode acts like a local proxy server. It proxies all connections to a user-specified local port (3000 in the example above) in your laptop/PC to the SocketXP IoT Cloud Gateway using a secure SSL/TLS tunnel. Also the SocketXP IoT Agent authenticates itself with the SocketXP IoT Cloud Gateway using your auth token. This ensures that only legitimate, authenticated users are permitted to access your remote IoT devices. SocketXP ensures Zero-Trust security on all connected devices.
Now you can SSH into your IoT device using the local proxy port (3000), as shown in the example below.
Wherejohn is a user account that exists in your IoT device.
Tip
You can also use PuTTY SSH client to remote SSH into your device using the same parameters show above. You can also use PuTTY or FileZilla to perform SFTP actions such as file upload and file download on your remote IoT or Pi device.

Tip
We recommend that you download, install and configure SocketXP agent on your IoT device using the WiFi connection in your office network. This way you could save your cellular data for use in the field. Once you have setup SocketXP IoT agent on your device, you could shutdown the WiFi interface in your IoT device and turn-on the WLAN interface (the interface on which your 3G or 4G LTE dongle is connected.). Verify you could remote SSH into your device from the SocketXP portal via your cellular network. Your device is ready to be placed in the field for secure remote access.